Generate Normal Maps for Unity in 3 Steps
This tutorial shows how to create a normal map online and prepare it for Unity. Everything runs locally in your browser — no uploads required.
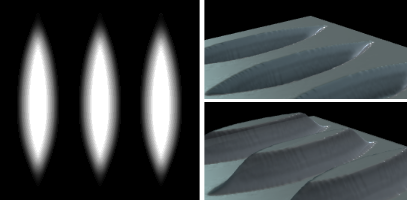
Step 1 — Upload a Height Map
Open the online normal map generator and drag a grayscale height map into the HeightMap panel. You can also try the example below.
Step 2 — Adjust Normal Settings
- Strength: 2.0–3.0 for most surfaces; reduce for subtle detail.
- Level: balances mid‑tones; keep around 6–8.
- Blur/Sharp: smooth noisy scans; sharpen stylized textures.
- Invert R/G: leave off for Unity’s default tangent space.
The preview updates instantly. Use the 3D preview on the right to validate lighting.
Step 3 — Export and Import in Unity
- Choose PNG and click Download.
- Drag the PNG into Unity’s Project window.
- Select the texture and tick Texture Type = Normal map (or click “Fix Now”).
- Assign it to your material’s Normal Map slot (Standard/Lit).
Tips
- Use Displacement and AO maps from the generator for advanced shaders.
- Keep textures power‑of‑two (512/1024/2048) for best GPU performance.